Aklımda Kalası Kelimeler

* давайте работать вместе
* Zarf ve Mazruf, Zerafet(xHoyratlık) ile aynı kökten(za-ra-fe) gelir
* Bedesten
* Suç subuta ermiştir - Suç sabit olmuştur
Android etiketine sahip kayıtlar gösteriliyor. Tüm kayıtları göster

19 Mart 2013 Salı

SimpleCursorAdapter vs CursorAdapter

Not olsun:
Tüm satırları tutacak olan LinearLayout:
<?xml version="1.0" encoding="utf-8"?>
<LinearLayout xmlns:android="http://schemas.android.com/apk/res/android"
    android:layout_width="match_parent"
    android:layout_height="match_parent"
    android:orientation="vertical" >

    <TableRow
        android:id="@+id/trHeader"
        android:layout_width="fill_parent"
        android:layout_height="wrap_content" >

        <TextView
            android:id="@+id/tvAdiSoyadi"
            android:layout_width="wrap_content"
            android:layout_height="wrap_content"
            android:text="@string/kisi_adi_soyadi" />

        <TextView
            android:id="@+id/tvAlani"
            android:layout_width="wrap_content"
            android:layout_height="wrap_content"
            android:text="@string/kisi_alani" />
    </TableRow>

    <ListView
        android:id="@+id/lvKisiler"
        android:layout_width="match_parent"
        android:layout_height="wrap_content" >
        
    </ListView>

</LinearLayout>
Her bir ListView item satırı:
<?xml version="1.0" encoding="utf-8"?>
<RelativeLayout xmlns:android="http://schemas.android.com/apk/res/android"
    android:layout_width="match_parent"
    android:layout_height="match_parent" >

    <CheckBox
        android:id="@+id/cbKisiId"
        android:layout_width="wrap_content"
        android:layout_height="wrap_content" />

    <TextView
        android:id="@+id/tvKisiId"
        android:layout_width="wrap_content"
        android:layout_height="wrap_content"
        android:layout_alignBaseline="@+id/rbKisi"
        android:layout_alignBottom="@+id/rbKisi"
        android:layout_toRightOf="@+id/rbKisi"
        android:text="ID"
        android:visibility="invisible" />

    <TextView
        android:id="@+id/tvAdi"
        android:layout_width="wrap_content"
        android:layout_height="wrap_content"
        android:layout_alignBaseline="@+id/tvKisiId"
        android:layout_alignBottom="@+id/tvKisiId"
        android:layout_marginLeft="15dp"
        android:layout_toRightOf="@+id/tvKisiId"
        android:text="Adi" />

    <TextView
        android:id="@+id/tvAlani"
        android:layout_width="wrap_content"
        android:layout_height="wrap_content"
        android:layout_below="@+id/rbKisi"
        android:layout_toRightOf="@+id/rbKisi"
        android:text="Alani" />

    <TextView
        android:id="@+id/tvSoyadi"
        android:layout_width="wrap_content"
        android:layout_height="wrap_content"
        android:layout_alignBaseline="@+id/tvAdi"
        android:layout_alignBottom="@+id/tvAdi"
        android:layout_marginLeft="10dp"
        android:layout_toRightOf="@+id/tvAdi"
        android:text="Soyadi" />

</RelativeLayout>
SimpleCursorAdapter ile bağlanması:
  ListView lvKisiler = (ListView) getActivity().findViewById(R.id.lvKisiler);
  Cursor crs = KisiDataSource.fetchAllKisiler(getActivity());

  String[] fields = new String[] { VTHelper.COL_KISILER_ID,
          VTHelper.COL_KISILER_ADI,
          VTHelper.COL_KISILER_SOYADI,
          VTHelper.COL_KISILER_ALANI };

  int[] toWidgets = new int[] { R.id.tvKisiId,
          R.id.tvAdi,
          R.id.tvSoyadi,
          R.id.tvAlani };
  
  SimpleCursorAdapter sca = new SimpleCursorAdapter(getActivity(), R.layout.kisi_satir, crs, fields, toWidgets, 0);
  lvKisiler.setAdapter(sca);
Custom CursorAdapter ile bağlanması:
CursorAdapter ca = new CursorAdapter(getActivity(), crs) {

 @Override
 public View newView(Context _ctx, Cursor _crs, ViewGroup _parent) {
  LayoutInflater inflater = LayoutInflater.from(_ctx);
  View v = inflater.inflate(R.layout.kisi_satir, _parent, false);
  bindView(v, _ctx, _crs);
  return v;
 }

 @Override
 public void bindView(View _view, Context _ctx, Cursor _crs) {
  CheckBox cbKisiId = (CheckBox)_view.findViewById(R.id.cbKisiId);
  TextView tvKisiId = (TextView)_view.findViewById(R.id.tvKisiId);
  tvKisiId.setText(_crs.getString(_crs.getColumnIndex(VTHelper.COL_KISILER_ID)));
  cbKisiId.setOnCheckedChangeListener(fk);
  TextView tvAdi = (TextView)_view.findViewById(R.id.tvAdi);
  tvAdi.setText(_crs.getString(_crs.getColumnIndex(VTHelper.COL_KISILER_ADI)));
  TextView tvSoyadi = (TextView)_view.findViewById(R.id.tvSoyadi);
  tvSoyadi.setText(_crs.getString(_crs.getColumnIndex(VTHelper.COL_KISILER_SOYADI)));
  TextView tvAlani= (TextView)_view.findViewById(R.id.tvAlani);
  tvAlani.setText(_crs.getString(_crs.getColumnIndex(VTHelper.COL_KISILER_ALANI)));

 }
};
lvKisiler.setAdapter(ca);


14 Mart 2013 Perşembe

BaseAdapter içinde işlenen sıralı metotlar

Daha önce bu yazımı okuyabilirsiniz: En Temel Generic Adapter


package com.example.adapters;

import java.util.ArrayList;
import com.example.fragmentornegi.R;
import android.content.Context;
import android.util.Log;
import android.view.LayoutInflater;
import android.view.View;
import android.view.ViewGroup;
import android.widget.BaseAdapter;
import android.widget.ImageView;
import android.widget.TextView;

public class SunumAdapter extends BaseAdapter {

 Context ctx;
 ArrayList<SunumSinif> alSunumlar = new ArrayList<SunumSinif>();
 ArrayList<SunumSinif> alHD = null;
 ArrayList<SunumSinif> alPD = null;
 ArrayList<SunumSinif> alNC = null;
 ArrayList<SunumSinif> alRP = null;
 LayoutInflater inf;

 public SunumAdapter(Context _ctx) {
  ctx = _ctx;
  inf = LayoutInflater.from(_ctx);
 }

 public void Ekle(SunumSinif _sunum) {
  if (_sunum.AitOlduguKonu == SunumSinif.KonuHD) {
   if (alHD == null)
    alHD = new ArrayList<SunumSinif>();
   alHD.add(_sunum);
  } else if (_sunum.AitOlduguKonu == SunumSinif.KonuNC) {
   if (alNC == null)
    alNC = new ArrayList<SunumSinif>();
   alNC.add(_sunum);
  } else if (_sunum.AitOlduguKonu == SunumSinif.KonuPD) {
   if (alPD == null)
    alPD = new ArrayList<SunumSinif>();
   alPD.add(_sunum);
  } else {
   if (alRP == null)
    alRP = new ArrayList<SunumSinif>();
   alRP.add(_sunum);
  }
  alSunumlar.add(_sunum);
 }

 @Override
 public int getCount() {
  Log.w("Adapter", "getCount:int");
  return alSunumlar.size();
 }

 @Override
 public Object getItem(int position) {
  Log.w("Adapter", "getItem:Object");
  return alSunumlar.get(position);
 }

 @Override
 public long getItemId(int position) {

  Log.w("Adapter", "getItemId:long");
  return 0;
 }

 public static SunumAdapter getAdapter(Context _ctx) {

  SunumSinif HD1 = new SunumSinif();
  HD1.AitOlduguKonu = SunumSinif.KonuHD;
  HD1.Baslik = "Hemodiyaliz Sunum 1";
  HD1.Tipi = SunumSinif.SunumTipleri.Resim;
  HD1.DosyaYolu = "file:///android_asset/hd1/";

  SunumSinif HD2 = new SunumSinif();
  HD2.AitOlduguKonu = SunumSinif.KonuHD;
  HD2.Baslik = "Hemodiyaliz Sunum 2";
  HD2.Tipi = SunumSinif.SunumTipleri.Resim;
  HD2.DosyaYolu = "file:///android_asset/hd2/";

  SunumSinif HD3 = new SunumSinif();
  HD3.AitOlduguKonu = SunumSinif.KonuHD;
  HD3.Baslik = "Hemodiyaliz Sunum 3";
  HD3.Tipi = SunumSinif.SunumTipleri.Resim;
  HD3.DosyaYolu = "file:///android_asset/hd3/";

  SunumSinif HD4 = new SunumSinif();
  HD4.AitOlduguKonu = SunumSinif.KonuHD;
  HD4.Baslik = "Hemodiyaliz Sunum 4";
  HD4.Tipi = SunumSinif.SunumTipleri.Resim;
  HD4.DosyaYolu = "file:///android_asset/hd4/";

  SunumSinif HDhtml1 = new SunumSinif();
  HDhtml1.AitOlduguKonu = SunumSinif.KonuHD;
  HDhtml1.Baslik = "Ayı Videolu HTML";
  HDhtml1.Tipi = SunumSinif.SunumTipleri.Html;
  HDhtml1.DosyaYolu = "file:///android_asset/hdHtml1/index.html";

  SunumAdapter sa = new SunumAdapter(_ctx);
  sa.Ekle(HD1);
  // sa.Ekle(HD2);
  // sa.Ekle(HD3);
  // sa.Ekle(HD4);
  // sa.Ekle(HDhtml1);
  return sa;
 }

 static class ViewHolder {
  TextView tvBaslik;
  TextView tvKonu;
 }

 @Override
 public View getView(int position, View convertView, ViewGroup parent) {
  ViewHolder holder;
  Log.w("Adapter", "getView:View");
  if (convertView == null) {
   convertView = inf.inflate(com.example.fragmentornegi.R.layout.sunum_satir, null);
   holder = new ViewHolder();
   convertView.setTag(holder);
   holder.tvBaslik = (TextView) convertView.findViewById(R.id.tvBaslik);
   holder.tvKonu = (TextView) convertView.findViewById(R.id.tvKonu);
  } else {
   holder = (ViewHolder) convertView.getTag();
  }

  holder.tvBaslik.setText(alSunumlar.get(position).Baslik);
  holder.tvKonu.setText(alSunumlar.get(position).AitOlduguKonu);
  return convertView;
 }

}

Eklemek istediğim şey ise, event sırası ve adediydi.
Ama önce aşağıdaki statik sınıfı neden yarattığımızı(bak aklıma ne geldi, yarattık dedi diye Allah'a -haşa rakip değil kimse ama- kafir ilan ederdik milleti, bence kelimeyi kutsallaştırmak en tehlikelisi, neyse konuya döneyim)anlatayım. ListView içinde satır sayısı çok olacaksa sürekli findViewById ile satır elemanlarını bulmak yerine statik bir sınıfa bu elemanları bağlamak ideal olanı (bkz static sınıf tanımlanması). Adapter sınıfımız içindeki ViewHolde static sınıfından türettiğimiz her nesne, static sınıfın bellekte tanımlı aynı yerine işaret edeceği için bileşenleri bulup bu static sınıf nesnesine atıyoruz ve böylece her View(liste satırı) oluştururken tekrar tekrar findViewById işlemi yapmıyoruz.
static class ViewHolder {
  TextView tvBaslik;
  TextView tvKonu;
}
Sınıf hazır ve getView içerisinde holder isminde değişken yaratıp eğer containerView boş ise değerini oluşturuyor değilse View sınıfının setTag metoduyla daha önce oluşturup atadığımız holder metodundan çekiyor ve satır bileşenlerinin değerlerini atıyoruz.
İlk yüklemede getCount metoduna 4 kez giriyor ve peşine getView metodu ve bir kez daha getCount ve getView daha.
Dokunduktan sonra ise getItem ve 3 kez getCount ardından iki kez getItemId .


Ekran görüntüsü ise:

13 Mart 2013 Çarşamba

Android içinde WebView kullanarak HTML gösterimi

Kendime not:
Video oynatılamıyor çünkü droid web browserlar html5 video oynatmaya yeterli değil
Android webview cannot render youtube video embedded via iframe

<!DOCTYPE html>
<html>
<body>
<img src="img/dac_logo.png"/>

<video width="320" height="240" controls>
  <source src="mm/movie.mp4" type="video/mp4">
  <source src="mm/movie.ogg" type="video/ogg">
  Your browser does not support the video tag.
</video>

</body>
</html>

package com.example.fragmentornegi;

import java.io.IOException;
import android.os.Bundle;
import android.support.v4.app.Fragment;
import android.util.Log;
import android.view.LayoutInflater;
import android.view.View;
import android.view.ViewGroup;
import android.webkit.WebSettings;
import android.webkit.WebView;

public class Sag extends Fragment {
 @Override
 public View onCreateView(LayoutInflater inflater, 
   ViewGroup container, 
   Bundle savedInstanceState) {
  return inflater.inflate(R.layout.sag, container, false);
 }

 @Override
 public void onStart() {
  super.onStart();
  try {
   String[] sarrH1Dosyalari = getActivity().getAssets().list("html");
   for (int i = 0; i < sarrH1Dosyalari.length; i++) {
    Log.w("HD 1 içindekiler", sarrH1Dosyalari[i]);
   }

   WebView wv = (WebView) getActivity().findViewById(R.id.webv);
   wv.getSettings().setJavaScriptEnabled(true);
   wv.getSettings().setPluginState(WebSettings.PluginState.ON);
   wv.loadUrl("file:///android_asset/html/index.html");

   final String mimetype = "text/html";
   final String encoding = "UTF-8";
  } catch (IOException e) {
   e.printStackTrace();
  }
 }
}

21 Şubat 2013 Perşembe

16 Ekim 2011 Pazar

Android assets klasörü

Android uygulama paketinin içinde yer alacak ama R.java içinde bir ID üretilmeyecek dosyaları tutan klasördür assets klasörü. Buradaki dosyalara erişmek için dosya yolunu vermek zorundayız.
InputSource isrc = new InputSource(ctx.getAssets().open("sirketLogosu.jpg"));

6 Ağustos 2011 Cumartesi

AsyncTask on Android

Süper bir açıklama
Güzel bir örnek
Gayem aklımdan çıkarsa notlarımda kalsın. AsyncTask bizim için Thread ve Handler tiplerini barındıran bir sınıf. Örneğin arka planda WebServisine bağlanmak ve veri çekip gelen veriyi ekranda bir bileşene bağlamak istiyorsunuz. İşte web servisine bir thread ile bağlanırsınız(böylece ekran donmamış olur -5sn donanı android kapıyomuş-) Handler ile de UI threadinde bileşene verileri aktarabiliyorsunuz.


AsyncTask
Thread [ doInBackground() metodunu kullanıyoruz ]
Handler [ onPostExecute() metodunu kullanıyoruz ]


AsyncTask sınıfının jenerik tipleri kullandığınıda ekleyelim:
AsyncTask <TypeOfVarArgParams , ProgressValue , ResultValue>
  1. doInBackground metoduna parametre geçirmek için
  2. TypeOfVarArgParams'ı kullanıyoruz.
  3. ProgressValueis parametresi ile işlem bilgisini geçiriyoruz.
  4. ResultValue ise Thread'in metodundan, Handler'ın onPostExecute metoduna dönen değeri gösteriyor.


 private class DownloadWebPageTask extends AsyncTask<String, Void, String> {
@Override
protected String doInBackground(String... urls) {
String response = "";
for (String url : urls) {
DefaultHttpClient client = new DefaultHttpClient();
HttpGet httpGet = new HttpGet(url);
try {
HttpResponse execute = client.execute(httpGet);
InputStream content = execute.getEntity().getContent();

BufferedReader buffer = new BufferedReader(
new InputStreamReader(content));
String s = "";
while ((s = buffer.readLine()) != null) {
response += s;
}

} catch (Exception e) {
e.printStackTrace();
}
}
return response;
}

@Override
protected void onPostExecute(String result) {
textView.setText(result);
}
}

public void readWebpage(View view) {
DownloadWebPageTask task = new DownloadWebPageTask();
task.execute(new String[] { "http://www.vogella.de" });

}

24 Temmuz 2011 Pazar

tag requires a 'drawable' attribute or child tag defining a drawable


Hata bu:
07-24 10:22:37.878: ERROR/AndroidRuntime(563): Caused by: org.xmlpull.v1.XmlPullParserException: Binary XML file line #6:  tag requires a 'drawable' attribute or child tag defining a drawable


Kaynağı:
<?xml version="1.0" encoding="utf-8"?>
<selector xmlns:android="http://schemas.android.com/apk/res/android">

<!-- pressed -->
<item android:state_pressed="true" />


Çözümü:
<item android:state_pressed="true" android:drawable="@drawable/cut_btn_pressed_state"/>
YA DA
<item>
<shape>
<solid android:color="#fff"/>
<stroke android:width="1px" android:color="#ff007f" />
<corners android:radius="18dp" />
</shape>
</item>


Sonuç: Bu xml içinde item etiketi ya xml özelliği(attribute) ya da içine etiket(tag) almak istiyor, olmayıncada hata veriyor.

23 Temmuz 2011 Cumartesi

Style ile elementin stilini belirlemek.


<?xml version="1.0" encoding="utf-8"?>
<resources>
<style name="cust_btn">
<item name="android:layout_width">fill_parent</item>
<item name="android:layout_height">wrap_content</item>
<item name="android:textColor">#ffffff</item>
<item name="android:gravity">center</item>
<item name="android:layout_margin">3dp</item>
<item name="android:textSize">30dp</item>
<item name="android:textStyle">bold</item>
<item name="android:shadowColor">#000000</item>
<item name="android:shadowDx">1</item>
<item name="android:shadowDy">1</item>
<item name="android:shadowRadius">2</item>
</style>
</resources>

Özelleştirilmiş android butonu tasarlamak

Yapmak istediğimiz düğme aşağıdaki gibi. 1inci resim tıklamadan, 2inci resim tıkladıktan sonraki hali (default, pressed).


Düğmemiz android sdk sından çıkan ilk haliyle şöyledir:
<Button
android:id="@+id/cust_button"
android:text="Özel Düğme"
android:layout_width="match_parent"
android:layout_height="wrap_content" />


Button etiketi içine text özellikleri vs. ekleyelim.
      <Button
android:id="@+id/cust_button"
android:text="Özel Düğme"
android:layout_width="match_parent"
android:layout_height="wrap_content"
android:color="#444"
android:radius="18dp"
android:textColor="#ff0000"
android:gravity="center"
android:textSize="30dp"
android:textStyle="bold"
android:shadowColor="#ff00ff"
android:shadowDx="1"
android:shadowDy="2"
android:shadowRadius="3" />

Bu güzel oldu ama main.xml layout dosyamız çok kabardı ve her yeni butona bu özellikler(xml attributes) eklemek istemeyiz. Hem köşeleri hafif oval, kenarlıklı ve basıldığında başka bir görüntüsü olan buton istiyoruz. Bu durumla başa çıkmak için android:background, android:textColor, style xml özellikleri(attributes) kullanabiliriz. android:background butonumuzun kavislerini, kenarlıklarını ve varsayılan, basılı ve odaklandığında(focus-bir elemente tab ile ya da fare ile(burada parmağımız) tıklandığında) alacağı halleri tutan xml dosyamızı oluşturmalıyız. Ama önce basıldığında, varsayılan, odaklanıldığında gibi halleri(state) anlayalım.

android:background


Android de View'dan türetilmiş elemanların aşağıdaki durumları vardır:
<?xml version="1.0" encoding="utf-8"?>
<selector xmlns:android="http://schemas.android.com/apk/res/android" >
<item
android:color="hex_color"
android:state_pressed=["true" | "false"]
android:state_focused=["true" | "false"]
android:state_selected=["true" | "false"]
android:state_checkable=["true" | "false"]
android:state_checked=["true" | "false"]
android:state_enabled=["true" | "false"]
android:state_window_focused=["true" | "false"] />
</selector>

Yukarıdaki durumlardan bizim düğmemiz(button) için geçerli olan android:state_focused ve android:state_pressed durumlarını ele alacağız.

Düğmemiz için yukarıdaki durumlarda nasıl görünmesini istiyorsak bunları res/drawable klasörüne xxxx.xml dosyası adında oluşturacağız:Bu dosya düğmemizin arka plan görüntüleri için kullanılacak.

Düğmemize basmadık; o zaman "pressed" durumuna girmeyiz, e focus'ta olmadığımıza göre default durumuna kadar geldik ve bu durumdaki şekili giydirmiş olacağız düğmemize. Akış bu şekilde olduğu için ilk denk geldiği durumu işleyecek bu yüzden en olmadığı en üste ve en varsayılan durumu ise en alta koyacağız.
<?xml version="1.0" encoding="utf-8"?>
<selector xmlns:android="http://schemas.android.com/apk/res/android">

<!-- pressed: the first item in the state list that matches the current state -->
<item android:state_pressed="true" ></item>

<!-- focused -->
<item android:state_focused="true" ></item>

<!-- default: value should always be last -->
<item></item>
</selector>


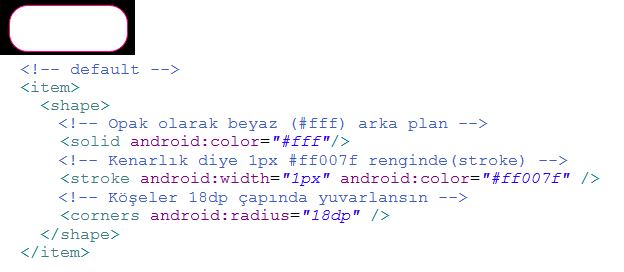
Varsayılan(default) durum yani düğmemizin kendi başına mel mel bakındığı durumu::
<!-- default -->
<item>
<shape>
<!-- Opak olarak beyaz (#fff) arka plan -->
<solid android:color="#fff"/>
<!-- Kenarlık diye 1px #ff007f renginde(stroke) -->
<stroke android:width="1px" android:color="#ff007f" />
<!-- Köşeler 18dp çapında yuvarlansın -->
<corners android:radius="18dp" />
</shape>
</item>


Artık diğer durumlarıda xml dosyamıza ekleyelim. FOCUS olduğunda ya da PRESSED olduğunda kenarlık rengini #444 rengine çekelim ve arka plan renginide geçişli(gradient) renk olarak boyayalım(startColor="#3787ff" endColor="#2f72d7" angle="270") ve dosyamızın son halini görelim:
cust_btn_bg.xml
<?xml version="1.0" encoding="utf-8"?>
<selector xmlns:android="http://schemas.android.com/apk/res/android">

<!-- pressed -->
<item android:state_pressed="true" >
<shape>
<stroke android:width="1px" android:color="#444" />
<corners android:radius="18dp" />
<gradient android:startColor="#3787ff" android:endColor="#2f72d7" android:angle="270" />
<corners android:radius="18dp" />
<!-- Düğmenin arka rengini tek renk yapmak istersek: -->
<!-- solid android:color="#ffff00" kullanırız -->
</shape>
</item>

<!-- focused -->
<item android:state_focused="true" >
<shape>
<stroke android:width="1px" android:color="#444" />
<corners android:radius="18dp" />
<gradient android:startColor="#3787ff" android:endColor="#2f72d7" android:angle="270" />
<corners android:radius="18dp" />
</shape>
</item>

<!-- default -->
<item>
<shape>
<solid android:color="#fff"/>
<stroke android:width="1px" android:color="#444" />
<corners android:radius="18dp" />
</shape>
</item>
</selector>
Yukarıdaki gibi her birini item etiketlerinin altına yazabildiğimiz gibi, bu durumları ayrı xml dosyalarına bölüp item etiketine ilgili durumun xml dosyasınıda verebiliriz. Tıpkı aşağıdaki gibi:
<?xml version="1.0" encoding="utf-8"?>
<selector xmlns:android="http://schemas.android.com/apk/res/android">

<!-- pressed -->
<item android:state_pressed="true" android:drawable="@drawable/cust_btn_pressed_state"/>

<!-- focused -->
<item android:state_focused="true" >
<shape>
<stroke android:width="1px" android:color="#444" />
<corners android:radius="18dp" />
<gradient android:startColor="#3787ff" android:endColor="#2f72d7" android:angle="270" />
<corners android:radius="18dp" />
</shape>
</item>

<!-- default -->
<item>
<shape>
<!-- Opak olarak beyaz (#fff) arka plan -->
<solid android:color="#fff"/>
<!-- Kenarlık diye 1px #ff007f renginde(stroke) -->
<stroke android:width="1px" android:color="#ff007f" />
<!-- Köşeler 18dp çapında yuvarlansın -->
<corners android:radius="18dp" />
</shape>
</item>

</selector>
Pressed halini drawable klasöründe cust_btn_pressed_state.xml dosyasına yazıyor ve item etiketinede android:drawable="@drawable/cust_btn_pressed_state" xml özelliği içinde belirtiyoruz.
Peki cust_btn_pressed.xml dosyamız nasıl oldu:
<?xml version="1.0" encoding="utf-8"?>
<selector xmlns:android="http://schemas.android.com/apk/res/android">
<!-- Artık state_pressed olduğunu buraya yazmamıza gerek yok. Çünkü bir üst xmlden bu xml i çağırıyoruz ve orada state_pressed olarak belirtildi. -->
<item>
<shape>
<stroke android:width="1px" android:color="#444" />
<corners android:radius="18dp" />
<gradient android:startColor="#3787ff" android:endColor="#2f72d7" android:angle="270" />
<corners android:radius="18dp" />
</shape>
</item>

</selector>

android:text


Düğmemizin üstüneki yazıya renk, gölge, ebat, tarz(stil) eklemek için kullandığımız xml özelliklerini(attribute) her düğmeye bu özellikleri tekrar tekrar yazmamak için tarz(style) dosyası oluşturmamız gerek. styles.xml dosyasına uygulamamızın css dosyası gibi bakabiliriz. Burada bir css elementi oluşturur style etiketi içine tarz bilgilerini yazalım.
<?xml version="1.0" encoding="utf-8"?>
<resources>
<style name="cust_btn_stil">
<item name="android:layout_width">fill_parent</item>
<item name="android:layout_height">wrap_content</item>
<item name="android:textColor">#ffffff</item>
<item name="android:gravity">center</item>
<item name="android:layout_margin">3dp</item>
<item name="android:padding">10dp</item>
<item name="android:textSize">20dp</item>
<item name="android:textStyle">normal</item>
<item name="android:shadowColor">#e2e</item>
<item name="android:shadowDx">1</item>
<item name="android:shadowDy">1</item>
<item name="android:shadowRadius">2</item>
</style>
</resources>
Artık düğmemize(button) şu xml özelliğini(xml attribute) ekleyerek düğmemizin üstündeki metnin tarzını hızlıca atamış oluruz. Dahası bundan sonra aynı tarzda olacak elemanlarada kısaca bu bilgiyi atayabiliriz.
<Button
android:id="@+id/btnNext"
android:text="@string/btnNext"
android:background="@drawable/cust_btn_bg"
style="@style/cust_btn_tarz" />


android:textColor


cust_btn_text.xml adlı dosyayı res/drawable klasöründe saklayalım.Text özelliklerini biraz değiştirerek yukarıdaki styles.xml dosyasında sakladık ama düğmeye basıldığında metin rengi değişik olsun istiyoruz. Bunu sağlamak için cust_btn_text.xml dosyasını aşağıdaki gibi düzenleyelim:
<?xml version="1.0" encoding="utf-8"?>
<selector xmlns:android="http://schemas.android.com/apk/res/android">
<!-- pressed -->
<item android:state_pressed="true" android:color="#ffff00" />

<!-- focused -->
<item android:state_focused="true" android:color="#fff" />

<!-- default -->
<item android:color="#385487" />

</selector>
Artık düğmemizin metin rengide her durumda farklı bir renk alacak. Bu kaynak dosyasını(resource file hatta drawable file) düğmemizin belirtildiği(declare edildiği) xml etiketinde android:textColor xml özelliğinde belirtelim. Artık düğmemizin son hali:
<Button
android:id="@+id/btnNext"
android:text="@string/btnNext"
android:background="@drawable/cust_btn_bg"
style="@style/cust_btn_tarz"
android:textColor="@drawable/cust_btn_text" />
olacak.

Bu kadar yeterli sanırım bu işi anlamak için. Sonuçta çıkan düğmenin renkleri başta belirttiğimiz gibi olmadı çünkü bende öğrenirken oynaya oynaya yoldan çıkarttım düğmemizi :)


Referanslar: Drawable Resources(developer.android.com)
Bitmap File
A bitmap graphic file (.png, .jpg, or .gif). Creates a BitmapDrawable.
<ImageView
android:layout_height="wrap_content"
android:layout_width="wrap_content"
android:src="@drawable/myimage" />

Nine-Patch File
A PNG file with stretchable regions to allow image resizing based on content (.9.png). Creates a NinePatchDrawable.
<Button
android:layout_height="wrap_content"
android:layout_width="wrap_content"
android:background="@drawable/myninepatch" />

Layer List
A Drawable that manages an array of other Drawables. These are drawn in array order, so the element with the largest index is be drawn on top. Creates a LayerDrawable.
<layer-list
xmlns:android="http://schemas.android.com/apk/res/android" >
<item
android:drawable="@[package:]drawable/drawable_resource"
android:id="@[+][package:]id/resource_name"
android:top="dimension"
android:right="dimension"
android:bottom="dimension"
android:left="dimension" />
</layer-list>

State List
An XML file that references different bitmap graphics for different states (for example, to use a different image when a button is pressed). Creates a StateListDrawable.
<selector xmlns:android="http://schemas.android.com/apk/res/android"
android:constantSize=["true" | "false"]
android:dither=["true" | "false"]
android:variablePadding=["true" | "false"] >
<item
android:drawable="@[package:]drawable/drawable_resource"
android:state_pressed=["true" | "false"]
android:state_focused=["true" | "false"]
android:state_selected=["true" | "false"]
android:state_checkable=["true" | "false"]
android:state_checked=["true" | "false"]
android:state_enabled=["true" | "false"]
android:state_window_focused=["true" | "false"] />
</selector>

Level List
An XML file that defines a drawable that manages a number of alternate Drawables, each assigned a maximum numerical value. Creates a LevelListDrawable.
<level-list
xmlns:android="http://schemas.android.com/apk/res/android" >
<item
android:drawable="@drawable/drawable_resource"
android:maxLevel="integer"
android:minLevel="integer" />
</level-list>

Transition Drawable
An XML file that defines a drawable that can cross-fade between two drawable resources. Creates a TransitionDrawable.
<transition
xmlns:android="http://schemas.android.com/apk/res/android" >
<item
android:drawable="@[package:]drawable/drawable_resource"
android:id="@[+][package:]id/resource_name"
android:top="dimension"
android:right="dimension"
android:bottom="dimension"
android:left="dimension" />
</transition>

Inset Drawable
An XML file that defines a drawable that insets another drawable by a specified distance. This is useful when a View needs a background drawble that is smaller than the View's actual bounds.
<inset
xmlns:android="http://schemas.android.com/apk/res/android"
android:drawable="@drawable/drawable_resource"
android:insetTop="dimension"
android:insetRight="dimension"
android:insetBottom="dimension"
android:insetLeft="dimension" />

Clip Drawable
An XML file that defines a drawable that clips another Drawable based on this Drawable's current level value. Creates a ClipDrawable.
<clip
xmlns:android="http://schemas.android.com/apk/res/android"
android:drawable="@drawable/drawable_resource"
android:clipOrientation=["horizontal" | "vertical"]
android:gravity=["top" | "bottom" | "left" | "right" | "center_vertical" |
"fill_vertical" | "center_horizontal" | "fill_horizontal" |
"center" | "fill" | "clip_vertical" | "clip_horizontal"] />

Scale Drawable
An XML file that defines a drawable that changes the size of another Drawable based on its current level value. Creates a ScaleDrawable
<scale
xmlns:android="http://schemas.android.com/apk/res/android"
android:drawable="@drawable/drawable_resource"
android:scaleGravity=["top" | "bottom" | "left" | "right" | "center_vertical" |
"fill_vertical" | "center_horizontal" | "fill_horizontal" |
"center" | "fill" | "clip_vertical" | "clip_horizontal"]
android:scaleHeight="percentage"
android:scaleWidth="percentage" />

Shape Drawable
An XML file that defines a geometric shape, including colors and gradients. Creates a ShapeDrawable.
<shape
xmlns:android="http://schemas.android.com/apk/res/android"
android:shape=["rectangle" | "oval" | "line" | "ring"] >
<corners
android:radius="integer"
android:topLeftRadius="integer"
android:topRightRadius="integer"
android:bottomLeftRadius="integer"
android:bottomRightRadius="integer" />
<gradient
android:angle="integer"
android:centerX="integer"
android:centerY="integer"
android:centerColor="integer"
android:endColor="color"
android:gradientRadius="integer"
android:startColor="color"
android:type=["linear" | "radial" | "sweep"]
android:usesLevel=["true" | "false"] />
<padding
android:left="integer"
android:top="integer"
android:right="integer"
android:bottom="integer" />
<size
android:width="integer"
android:height="integer" />
<solid
android:color="color" />
<stroke
android:width="integer"
android:color="color"
android:dashWidth="integer"
android:dashGap="integer" />
</shape>

17 Temmuz 2011 Pazar

Bir sınıfa Parcelable uyarlamak


package cem.examples.reminder;

import java.util.ArrayList;
import java.util.List;
import android.os.Parcel;
import android.os.Parcelable;
import android.text.Html;
import android.text.Spanned;

public class Information implements Parcelable {
public Spanned MTitle;
public Spanned MContent;
public List<String> MTags;

// Her property sırayla yazılır
public void writeToParcel(Parcel dest, int flag) {
dest.writeString(MTitle.toString());
dest.writeString(MContent.toString());
dest.writeStringList(MTags);
}

// Parcel tipinde içinde objemiz olan in parametresini yazdığımız sırada
// okuyacağız
void readFromParcel(Parcel in) {
MTitle = Html.fromHtml(in.readString()); // String tipini Spanned tipine
// HTML.fromHtml() metoduyla
// döndüreceğiz
MContent = Html.fromHtml(in.readString());

// Eğer MTags yaratılmamışsa hata almamak için yaratacağız
if (MTags == null) {
MTags = new ArrayList<String>();
}
// ve içine Parcel tipindeki in objemizde ne buluyorsak yazacağız
in.readStringList(MTags);
}

// Parcalable dan geliyor, nedir bilemiyorum şimdilik
public int describeContents() {
return 0;
}

// Bunu da şimdilik neden oluşturuyoruz bilemiyorum
public static final Parcelable.Creator<Information> CREATOR = new Creator<Information>() {

public Information[] newArray(int size) {
return new Information[size];
}

public Information createFromParcel(Parcel source) {
return new Information(source);
}
};

// Varsayılan yapıcı metodumu bu
public Information() {
}

// Bunu da Parcel objesinden Information objesine giderken kullanıyor
public Information(Parcel in) {
this();
readFromParcel(in);
}

public Information(String _title, String _content) {
MTitle = Html.fromHtml(_title);
MContent = Html.fromHtml(_content);
}

// Information sınıfına yazdığım metot
public void f_AddTag(String... _tags) {
if (MTags == null) {
MTags = new ArrayList<String>();
}

for (String tag : _tags) {
MTags.add(tag);
}
}

// Biraz objem olsun diye kullanacağım
static public ArrayList<Information> TestInfos() {
ArrayList<Information> infos = new ArrayList<Information>();

String title = "<font color='red'>Basics of Android Intents</font>";
String content = "Although an intent is easily understood as a mechanism to invoke components(activities, services, broadcast receivers, and content providers), Android folds multiple ideas into the concept of an intent. You can use intents to invoke external applications from your application. You can use intents to invoke internal or external components from your application. You can use intents to raise events so that others can respond in a manner similar to a publish-and-subscribe model. You can use intents to raise alarms.";
Information info = new Information(title, content);
info.f_AddTag("Intent", "invoke");

infos.add(info);

title = "<b>The list of components in Android</b>";
content = "The list of components in Android include <i>activities</i> (UI components), <i>services</i> (background code), <i>broadcast receivers</i> (code that responds to broadcast messages), and <i>content providers</i> (code that abstracts data)";
info = new Information(title, content);
info.f_AddTag("component", "Android", "service");

infos.add(info);

return infos;
}

// Information sınıfına yazdığım metot
static public ArrayList<Information> BagliBasliklar(String _tag) {
ArrayList<Information> infos = TestInfos();

for (Information info : infos) {
if (!info.MTags.contains(_tag)) {
infos.remove(info);
}
}

return infos;
}
}


Information sınıfını Parcelable olarak ayarladık.
Şimdi bir ArrayList<Information> değişkenini Bundle içine koyup bir sonraki aktiviteye gönderelim.

public void onClick(View v) {
// Butonun Text'inde etiket adı var ve BagliBasliklar metodundan bu etiketleri süzüyoruz
Button btnTag = (Button) v;
ArrayList<Information> infos = Information.BagliBasliklar(btnTag.getText().toString());

// Intent'din ilgili aktivitesini belirlemek için aynı uygulamada olduğundan Activity Sınıfının adıylada çalıştırabiliriz
// Ya da .manifest dosyasında <Intent-Filter> içinde <action> etiketinin içine "cem.examples.reminder.intent.action.INFO_LIST" yazarakta aktiviteyi bulmayı sağlayabiliriz.
//
// <activity android:name=".Liste">
// <intent-filter>
// <action android:name="cem.examples.reminder.intent.action.INFO_LIST" />
// <category android:name="android.intent.category.DEFAULT" />
// </intent-filter>
//</activity>
Intent baslikListe = new Intent("cem.examples.reminder.intent.action.INFO_LIST");

// Veri aktarımı için putXXX(YYY) metodunu kullanıyoruz.
// Bizimkisi jenerik(generic olduğu için Parcelable tipini atadan alan) bir ArrayList olduğu için
// putParcelableArrayListExtra metodunu kullanacağız.
baslikListe.putParcelableArrayListExtra("baslikListe", infos);

// ve aktiviteyi bulup çalıştırması için Android sistemine emanet edeceğiz
startActivity(baslikListe);
}


Peki Aktivite bu bilgiyi aldığında Parcelable veriyi nasıl açacak?

Bundle extras = getIntent().getExtras();
ArrayList<Information> infos = extras.getParcelableArrayList("baslikListe");

// InformationTagsAdapter Adapter sınıfından türettiğimiz Liste yi istediğimiz bileşenlerin içinde
// göstermek için customize(özelleştirebildiğimiz) edebildiğimiz bir sınıf.
// Bu sınıf gelen veriyi yazdığımız bilgilere göre ekrandaki elemanlara bağlayan bir sınıf olacak.
setListAdapter(new InformationTagsAdapter(this, infos));

13 Haziran 2011 Pazartesi

Handler kullanarak Thread içinden UI bileşenine mesaj işlemek

Ref: http://www.helloandroid.com/tutorials/using-threads-and-progressdialog

public class ProgressDialogExample extends Activity implements Runnable {

private String pi_string;
private TextView tv;
private ProgressDialog pd;

@Override
public void onCreate(Bundle icicle) {
super.onCreate(icicle);
setContentView(R.layout.main);

tv = (TextView) this.findViewById(R.id.main);
tv.setText("Press any key to start calculation");
}

@Override
public boolean onKeyDown(int keyCode, KeyEvent event) {

pd = ProgressDialog.show(this, "Working..", "Calculating Pi", true,
false);

Thread thread = new Thread(this);
thread.start();

return super.onKeyDown(keyCode, event);
}

public void run() {
pi_string = Pi.computePi(800).toString();
handler.sendEmptyMessage(0);
}

private Handler handler = new Handler() {
@Override
public void handleMessage(Message msg) {
pd.dismiss();
tv.setText(pi_string);

}
};
}

29 Mayıs 2011 Pazar

Android ile DOTNET web servislerine bağlanmak


http://code.google.com/p/ksoap2-android/ adresinden ksoap2-android-assembly-2.5.4-jar-with-dependencies.jar dosyasını indirelim.


package cem.examples.webservicecall;

import org.ksoap2.SoapEnvelope;
import org.ksoap2.serialization.SoapObject;
import org.ksoap2.serialization.SoapPrimitive;
import org.ksoap2.serialization.SoapSerializationEnvelope;
import org.ksoap2.transport.HttpTransportSE;

import android.app.Activity;
import android.os.Bundle;
import android.widget.TextView;

public class MainActivity extends Activity {

final static String SOAP_ACTION = "http://tempuri.org/CelsiusToFahrenheit";
final static String METHOD_NAME = "CelsiusToFahrenheit";
final static String NAMESPACE = "http://tempuri.org/";
final static String URL = "http://www.w3schools.com/webservices/tempconvert.asmx";

TextView tv;

@Override
protected void onCreate(Bundle savedInstanceState) {
super.onCreate(savedInstanceState);
this.setContentView(R.layout.main);
// ---------------------------------------------------
tv = (TextView) findViewById(R.id.editText1);

SoapObject Request = new SoapObject(NAMESPACE, METHOD_NAME);
Request.addProperty("Celsius", "32");

SoapSerializationEnvelope soapEnvelope = new SoapSerializationEnvelope(SoapEnvelope.VER11);
soapEnvelope.dotNet = true;

soapEnvelope.setOutputSoapObject(Request);
HttpTransportSE aht = new HttpTransportSE(URL);
aht.call(SOAP_ACTION, soapEnvelope);
String result = "Sonuç: "+(SoapPrimitive) soapEnvelope.getResponse();

tv.setText("Sonuç: " + result);
}
}

28 Mayıs 2011 Cumartesi

Activity ler arasında geçiş


Activity1.java

package cem.examples.activityswitch;

import android.app.Activity;
import android.content.Intent;
import android.os.Bundle;
import android.view.View;
import android.view.View.OnClickListener;
import android.widget.Button;

public class Activity1 extends Activity implements OnClickListener {

@Override
protected void onCreate(Bundle savedInstanceState) {
super.onCreate(savedInstanceState);this.setContentView(R.layout.main);
// ------------------------------------------------------
Button btn = (Button) findViewById(R.id.button1);
btn.setOnClickListener(this);
}

@Override
public void onClick(View v) {
Intent myint = new Intent(v.getContext(),Activity2.class);
startActivityForResult(myint, 0);
}
}


Activity2.java

package cem.examples.activityswitch;

import android.app.Activity;
import android.os.Bundle;
import android.view.View;
import android.view.View.OnClickListener;
import android.view.ViewGroup.LayoutParams;
import android.widget.Button;
import android.widget.LinearLayout;

public class Activity2 extends Activity implements OnClickListener {

@Override
protected void onCreate(Bundle savedInstanceState) {
super.onCreate(savedInstanceState);
this.setContentView(R.layout.activite2);
// --------------------------------------------------------------
Button btnPre = new Button(this);
btnPre.setText("Geriiiii");
// Butonun layout üzerinde alacağı görünüm parametreleri
LayoutParams params = new LayoutParams(
LayoutParams.MATCH_PARENT,
LayoutParams.MATCH_PARENT);
// --------------------------------------------------------------
LinearLayout layout = (LinearLayout) findViewById(R.id.lout);
layout.addView(btnPre, params);
// --------------------------------------------------------------
// Önceki aktiviteye gidelim.
btnPre.setOnClickListener(this);
}

@Override
public void onClick(View v) {
// Call this to set the result that your activity will return to its caller.
setResult(RESULT_OK);
// Call this when your activity is done and should be closed
finish();
}
}


AndroidManifest.xml

<?xml version="1.0" encoding="utf-8"?>
<manifest xmlns:android="http://schemas.android.com/apk/res/android"
package="cem.examples.activityswitch" android:versionCode="1"
android:versionName="1.0">
<uses-sdk android:minSdkVersion="8" />

<application android:icon="@drawable/icon" android:label="@string/app_name">

<activity android:name=".Activity1" android:label="Activite Etiketi"
android:screenOrientation="portrait">
<intent-filter>
<action android:name="android.intent.action.MAIN" />
<category android:name="android.intent.category.LAUNCHER" />
</intent-filter>
</activity>
<activity android:name=".Activity2"></activity>
</application>
</manifest>

Toast androidin MessageBox'ı gibi


package cem.examples.activityswitch;

import android.app.Activity;
import android.os.Bundle;
import android.text.Html;
import android.text.Spanned;
import android.view.View;
import android.view.View.OnClickListener;
import android.widget.Button;
import android.widget.Toast;

public class Activity1 extends Activity implements OnClickListener {

@Override
protected void onCreate(Bundle savedInstanceState) {
super.onCreate(savedInstanceState);
this.setContentView(R.layout.main);
Button btn = (Button) findViewById(R.id.button1);
btn.setOnClickListener(this);
}

@Override
public void onClick(View v) {
String shtml = "İşte "
+ "ekranda"
+ " mesaj"
+ " kutusu";
Spanned sMesaj = Html.fromHtml(shtml);
Toast.makeText(this, sMesaj, Toast.LENGTH_SHORT).show();
}
}


android.widget.Toast

A toast is a view containing a quick little message for the user. The toast class helps you create and show those.

When the view is shown to the user, appears as a floating view over the application. It will never receive focus. The user will probably be in the middle of typing something else. The idea is to be as unobtrusive as possible, while still showing the user the information you want them to see. Two examples are the volume control, and the brief message saying that your settings have been saved.

The easiest way to use this class is to call one of the static methods that constructs everything you need and returns a new Toast object.

Activity ve AndroidManifest.xml ilişkisi ve No Launcher activity found! hatası

Proje oluşturulurken "Main Activity" oluşturulmamışsa AndroidManifest.xml dosyası aşağıdaki gibidir.

<?xml version="1.0" encoding="utf-8"?>
<manifest xmlns:android="http://schemas.android.com/apk/res/android"
package="cem.examples.activityswitch" android:versionCode="1"
android:versionName="1.0">
<uses-sdk android:minSdkVersion="8" />

<application android:icon="@drawable/icon" android:label="@string/app_name">

</application>
</manifest>

Buna göre program AVD ye yüklenirken Console çıktısı şöyle olur:

...
[2011-05-28 13:31:16 - switchActivity] Android Launch!
[2011-05-28 13:31:16 - switchActivity] adb is running normally.
[2011-05-28 13:31:16 - switchActivity] No Launcher activity found!
[2011-05-28 13:31:16 - switchActivity] The launch will only sync the application package on the device!

[2011-05-28 13:31:16 - switchActivity] Performing sync
...

AndroidManifest.xml dosyasına başlatılacak Activity sınıfından türetilmiş bir ***.java dosyasının sınıfını LAUNCH edilecek MAIN action olarak belirtmemiz gerekiyor. Bunu da aşağıdaki <activity> xml elemanını <application> xml elemanının içine koyarak yaparız:

<activity android:name=".Activity1" android:label="Activite Etiketi" android:screenOrientation="portrait">
<intent-filter>
<action android:name="android.intent.action.MAIN" />
<category android:name="android.intent.category.LAUNCHER" />
</intent-filter>
</activity>

Sonuç:


<?xml version="1.0" encoding="utf-8"?>
<manifest xmlns:android="http://schemas.android.com/apk/res/android"
package="cem.examples.activityswitch" android:versionCode="1"
android:versionName="1.0">
<uses-sdk android:minSdkVersion="8" />

<application android:icon="@drawable/icon" android:label="@string/app_name">

<activity android:name=".Activity1" android:label="Activite Etiketi"
android:screenOrientation="portrait">
<intent-filter>
<action android:name="android.intent.action.MAIN" />
<category android:name="android.intent.category.LAUNCHER" />
</intent-filter>
</activity>

</application>
</manifest>


Android API Level

Platform Version API Level
Android 2.2 8
Android 2.1 7
Android 2.0.16
Android 2.0 5
Android 1.6 4
Android 1.5 3
Android 1.1 2
Android 1.0 1

27 Mayıs 2011 Cuma

Neden android'de + işaretini id nin önüne koyarız?


@+id/degiskenAdi
uygulamanın namespace inde "degiskenAdi" isimli bir "id" oluşturuyorsun demektir.

Bu durumda degiskenAdi uygulamada R.java dosyasına eklenecek.

Artık @id/degiskenAdi diyerek erişebilirsin.
Her ID nin bir integer değere karşılık geldiğini ama objenin bulunduğu layoutun xml'inde string olarak belirtilir.

@android:id/degiskenAdi
android isim uzayında (namespace) tanımlı degiskenAdi'nı işaret ediyorsun demektir(Android resource ID) ve + kullanman gerekmez. Android resource ID ye ulaşmak için kesinlikle "@android:" ile başlaman gerekir.

android:*** Android framework'ündeki *** diye tanımlı şeye referans verdiğini gösterir.


ID

http://developer.android.com/guide/topics/ui/declaring-layout.html

Any View object may have an integer ID associated with it, to uniquely identify the View within the tree. When the application is compiled, this ID is referenced as an integer, but the ID is typically assigned in the layout XML file as a string, in the id attribute. This is an XML attribute common to all View objects (defined by the View class) and you will use it very often. The syntax for an ID, inside an XML tag is:

android:id="@+id/my_button"

The at-symbol (@) at the beginning of the string indicates that the XML parser should parse and expand the rest of the ID string and identify it as an ID resource. The plus-symbol (+) means that this is a new resource name that must be created and added to our resources (in the R.java file). There are a number of other ID resources that are offered by the Android framework. When referencing an Android resource ID, you do not need the plus-symbol, but must add the android package namespace, like so:

android:id="@android:id/empty"

With the android package namespace in place, we're now referencing an ID from the android.R resources class, rather than the local resources class.

In order to create views and reference them from the application, a common pattern is to:

1. Define a view/widget in the layout file and assign it a unique ID:

<button id="@+id/my_button" layout_width="wrap_content" layout_height="wrap_content" text="@string/my_button_text">

2. Then create an instance of the view object and capture it from the layout (typically in the onCreate() method):

Button myButton = (Button) findViewById(R.id.my_button);

Defining IDs for view objects is important when creating a RelativeLayout. In a relative layout, sibling views can define their layout relative to another sibling view, which is referenced by the unique ID.

An ID need not be unique throughout the entire tree, but it should be unique within the part of the tree you are searching (which may often be the entire tree, so it's best to be completely unique when possible).

26 Mayıs 2011 Perşembe

ListView'ı SimpleCursorAdapter ile bağlamak


public void onCreate(Bundle savedInstanceState) {
super.onCreate(savedInstanceState);

setContentView(R.layout.main);

ListView lv1 = (ListView) findViewById(R.id.lv1);
lv1.setAdapter(getContactsAdapter());
}

private SimpleCursorAdapter getContactsAdapter() {
Cursor cursor = getCursor();
SimpleCursorAdapter sca = new SimpleCursorAdapter(
this,
R.layout.list_layout,
cursor,
new String[] { "DISPLAY_NAME", "_id" },
new int[] { R.id.name_entry, R.id.number_entry });
return sca;
}

private Cursor getCursor() {
String[] projection = null; // new String[]{
// ContactsContract.Contacts.DISPLAY_NAME,
// ContactsContract.Contacts.PHOTO_ID };

// DISPLAY_NAME LIKE ? AND HAS_PHONE_NUMBER = ?
String selection = ContactsContract.Contacts.DISPLAY_NAME
+ " LIKE ? AND " + ContactsContract.Contacts.HAS_PHONE_NUMBER
+ " = ?";

// Adı A ile başlayan ve telefon numarası olanlar
String[] selectionArgs = new String[] { "A%", "1" };

// Sıralama _ID ye göre tersten olsun
String sort = ContactsContract.Contacts._ID + " DESC";

Cursor cursor = getContentResolver().query(
ContactsContract.Contacts.CONTENT_URI, projection, selection,
selectionArgs, sort);
return cursor;
}

25 Mayıs 2011 Çarşamba

Content Provider ile Telefon Rehberini TextView içinde görüntülemek


TextView içine kriterlere uyan telefondaki kişiler listesini renklendirerek eklemek.


package com.example.telefonlistesi;

import android.app.Activity;
import android.database.Cursor;
import android.os.Bundle;
import android.provider.ContactsContract;
import android.text.Html;
import android.widget.TextView;

public class TelefonListesi extends Activity {

@Override
public void onCreate(Bundle savedInstanceState) {
super.onCreate(savedInstanceState);

setContentView(R.layout.main);

TextView tv = (TextView) findViewById(R.id.txt1);

getContacts(tv);
}

public void getContacts(TextView tv) {

String[] projection = null; // new String[]{
// ContactsContract.Contacts.DISPLAY_NAME,
// ContactsContract.Contacts.PHOTO_ID };

// DISPLAY_NAME LIKE ? AND HAS_PHONE_NUMBER = ?
String selection = ContactsContract.Contacts.DISPLAY_NAME
+ " LIKE ? AND " + ContactsContract.Contacts.HAS_PHONE_NUMBER
+ " = ?";

// Adı A ile başlayan ve telefon numarası olanlar
String[] selectionArgs = new String[] { "A%", "1" };

// Sıralama _ID ye göre tersten olsun
String sort = ContactsContract.Contacts._ID + " DESC";

Cursor cursor = getContentResolver().query(
ContactsContract.Contacts.CONTENT_URI,
projection,
selection,
selectionArgs,
sort);

while (cursor.moveToNext()) {

String contactId = cursor.getString(cursor.getColumnIndex(ContactsContract.Contacts._ID));
String hasPhone = cursor.getString(cursor.getColumnIndex("HAS_PHONE_NUMBER"));
String displayName = cursor.getString(cursor.getColumnIndex("display_name"));
tv.append("\nID: " + contactId);
tv.append("\tDISP. NAME: " + displayName);

if (Integer.parseInt(hasPhone) > 0) {

Cursor crPhones = getContentResolver().query(
ContactsContract.CommonDataKinds.Phone.CONTENT_URI,
null,
ContactsContract.CommonDataKinds.Phone.CONTACT_ID + " = " + contactId,
null,
null);

while (crPhones.moveToNext()) {
String phoneNumber = crPhones.getString(
crPhones.getColumnIndex(
ContactsContract.CommonDataKinds.Phone.NUMBER
)
);
tv.append(Html.fromHtml("\tPHONE: " + phoneNumber+""));
}
crPhones.close();
}
}
}
}

24 Mayıs 2011 Salı

Layouts

Linear Layout


<?xml version="1.0" encoding="utf-8"?>
<LinearLayout xmlns:android="http://schemas.android.com/apk/res/android"
android:orientation= "vertical"
android:layout_width= "fill_parent"
android:layout_height= "fill_parent" >

<LinearLayout
android:orientation= "horizontal"
android:layout_width= "fill_parent"
android:layout_height= "fill_parent"
android:layout_weight= "1" >
<TextView
android:text= "red"
android:gravity= "center_horizontal"
android:background= "#aa0000"
android:layout_width= "wrap_content"
android:layout_height= "fill_parent"
android:layout_weight= "1" />
<TextView
android:text= "green"
android:gravity= "center_horizontal"
android:background= "#00aa00"
android:layout_width= "wrap_content"
android:layout_height= "fill_parent"
android:layout_weight= "1" />
<TextView
android:text= "blue"
android:gravity= "center_horizontal"
android:background= "#0000aa"
android:layout_width= "wrap_content"
android:layout_height= "fill_parent"
android:layout_weight= "1" />
<TextView
android:text= "yellow"
android:gravity= "center_horizontal"
android:background= "#aaaa00"
android:layout_width= "wrap_content"
android:layout_height= "fill_parent"
android:layout_weight= "1" />
</LinearLayout>

<LinearLayout
android:orientation= "vertical"
android:layout_width= "fill_parent"
android:layout_height= "fill_parent"
android:layout_weight= "1" >
<TextView
android:text= "row one"
android:textSize= "15pt"
android:layout_width= "fill_parent"
android:layout_height= "wrap_content"
android:layout_weight= "1" />
<TextView
android:text= "row two"
android:textSize= "15pt"
android:layout_width= "fill_parent"
android:layout_height= "wrap_content"
android:layout_weight= "1" />
<TextView
android:text= "row three"
android:textSize= "15pt"
android:layout_width= "fill_parent"
android:layout_height= "wrap_content"
android:layout_weight= "1" />
<TextView
android:text= "row four"
android:textSize= "15pt"
android:layout_width= "fill_parent"
android:layout_height= "wrap_content"
android:layout_weight= "1" />
</LinearLayout>

</LinearLayout>


Relative Layout


<?xml version="1.0" encoding="utf-8"?>
<RelativeLayout xmlns:android="http://schemas.android.com/apk/res/android"
android:layout_width="fill_parent"
android:layout_height="fill_parent">
<TextView
android:id="@+id/label"
android:layout_width="fill_parent"
android:layout_height="wrap_content"
android:text="Type here:"/>
<EditText
android:id="@+id/entry"
android:layout_width="fill_parent"
android:layout_height="wrap_content"
android:background="@android:drawable/editbox_background"
android:layout_below="@id/label"/>
<Button
android:id="@+id/ok"
android:layout_width="wrap_content"
android:layout_height="wrap_content"
android:layout_below="@id/entry"
android:layout_alignParentRight="true"
android:layout_marginLeft="10dip"
android:text="OK" />
<Button
android:layout_width="wrap_content"
android:layout_height="wrap_content"
android:layout_toLeftOf="@id/ok"
android:layout_alignTop="@id/ok"
android:text="Cancel" />
</RelativeLayout>


Table Layout


<?xml version="1.0" encoding="utf-8"?>
<TableLayout xmlns:android="http://schemas.android.com/apk/res/android"
android:layout_width="fill_parent"
android:layout_height="fill_parent"
android:stretchColumns="1">

<TableRow>
<TextView
android:layout_column="1"
android:text="Open..."
android:padding="3dip"/>
<TextView
android:text="Ctrl-O"
android:gravity="right"
android:padding="3dip"/>
</TableRow>

<TableRow>
<TextView
android:layout_column="1"
android:text="Save..."
android:padding="3dip"/>
<TextView
android:text="Ctrl-S"
android:gravity="right"
android:padding="3dip"/>
</TableRow>

<TableRow>
<TextView
android:layout_column="1"
android:text="Save As..."
android:padding="3dip"/>
<TextView
android:text="Ctrl-Shift-S"
android:gravity="right"
android:padding="3dip"/>
</TableRow>

<View
android:layout_height="2dip"
android:background="#FF909090"/>

<TableRow>
<TextView
android:text="X"
android:padding="3dip"/>
<TextView
android:text="Import..."
android:padding="3dip"/>
</TableRow>

<TableRow>
<TextView
android:text="X"
android:padding="3dip"/>
<TextView
android:text="Export..."
android:padding="3dip"/>
<TextView
android:text="Ctrl-E"
android:gravity="right"
android:padding="3dip"/>
</TableRow>

<View
android:layout_height="2dip"
android:background="#FF909090"/>

<TableRow>
<TextView
android:layout_column="1"
android:text="Quit"
android:padding="3dip"/>
</TableRow>
</TableLayout>


Grid View


Ref: http://mono-android.net/Tutorials/Hello_Views/Grid_View

<?xml version="1.0" encoding="utf-8"?>
<GridView xmlns:android="http://schemas.android.com/apk/res/android"
android:id="@+id/gridview"
android:layout_width="fill_parent"
android:layout_height="fill_parent"
android:columnWidth="90dp"
android:numColumns="auto_fit"
android:verticalSpacing="10dp"
android:horizontalSpacing="10dp"
android:stretchMode="columnWidth"
android:gravity="center"
/>


Tab Layout


Nasıl yapılır?


List View